Office software is closely linked to the PDF,the PDF is also must have to control!
Set home Page Add to Favorites
|
a school uniform at the time before the examination, teachers will be issued their own paper's Word to the office unified electronic printing. But many teachers did not follow the paper format and require the use of eight to open the page, horizontally, in two columns, and the page margin settings are also varied, far from unified. In Word 2007, set a "unified Paper Format" button, one click, you can set the page to complete the work, is very simple. If you will encounter the same problem, so might as well do the same.
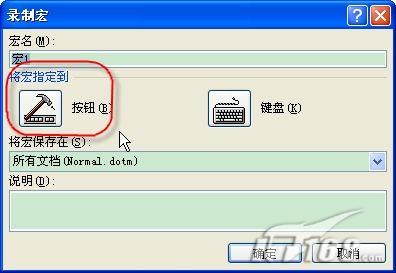
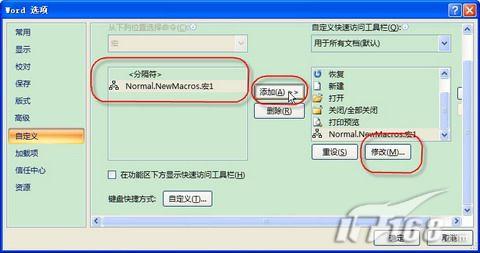
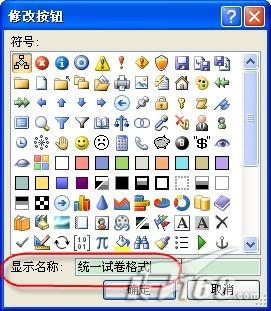
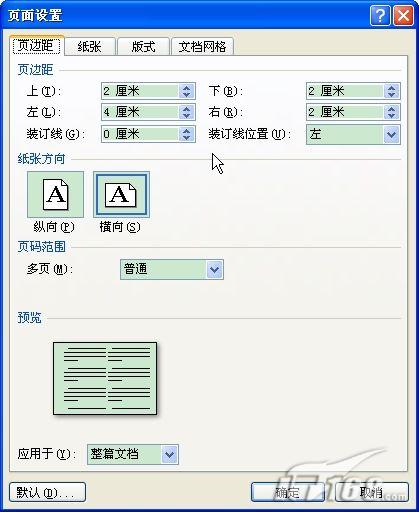
steps are as follows: one custom button Create a new Word document first, click on the upper left corner "Office button" in the lower right corner of the pop-up menu, click "Word Options" button in the dialog box that opens select "the Show" Development Tools "tab "recovery option. Close the dialog box, in the functional areas will be newly added, "Development Tools" tab. Click the "Tools" tab "code" function group "record macro" button, open the "Record Macro" dialog box, click the "macro assigned to the" project "button" button, as shown below :  At this point will open the "Word Options" dialog box will appear in the middle of the list "Normal.NewMacros. Macro 1" project. Select it and click the middle of the "Add" button to add it to the right of "Customize Quick Access Toolbar" list. Select the newly added item, click on the list below "Edit" button, as shown below:  In the open "Edit button" dialog box will bottom, "Display Name" input box "Normal.NewMacros. Macro 1" to "unity paper format," and in the top of the list to select a button style, as illustrated by said:  Close the dialog box, upper left corner in the Word window, "Customize Quick Access Toolbar" will have our newly added in this button up. $ Show_page $ 2, record a macro work done after the above, Word automatically record a macro state. Views Function Area "Page Layout" tab, "Page Setup" feature set the bottom right corner of the dialog box launcher, open the "Page Setup" dialog box. click on the dialog box "Paper" tab, in the paper, "width" and "high" input box and enter, respectively, "36.8" and "26" cm. In the "Margins" tab settings "on", "down", "right" margins are "2 cm", the "left" margin is set to "4 cm", the "paper direction" election for "horizontal", as shown below:
 in the "Document Grid" tab set the "column number" to "2." Click the OK button after setting close the dialog box. in the "Document Grid" tab set the "column number" to "2." Click the OK button after setting close the dialog box.
Now, casually open a document, click the Customize Quick Access Toolbar on the "unity of Paper Format" button, the document pages will automatically convert the format of our default. |