|
we all know, in the PPT presentation of the content to a unified format, background setting is very troublesome, then we can use the "View" "master" to conduct rapid format, background and other settings .
"Slide Master" is used to control the slide title and text input format and type, all the slides simultaneously change the text and objects. If you want to modify the appearance of more slides, do not modify a slide, but just do a slide master can be modified. PowerPoint will automatically update the existing slide, and add the slide after the application of these new changes.
Next, the form through the screenshots explain how.
1, the first use of "Master" function to quickly on the font, size, text color set:
Open the "View" | "master" in the "Slide Master." 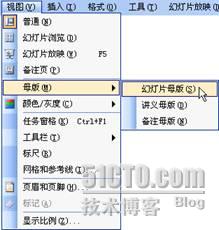
click on "Click here to edit Master title style" for font size font and color settings. 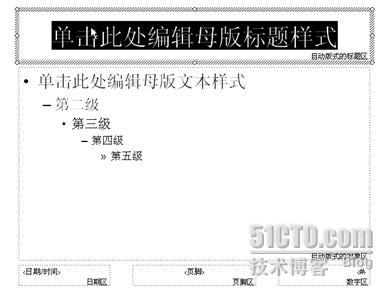
$ show_page $ placeholder in the text of the first-level heading click on "Click here to edit Master text styles" for the first-level style editing.

second, third and fourth grade level with the first editing method.
Click the master body text placeholder in the border, select "Format" | "Bullets and Numbering" Bullets and numbers can be selected. 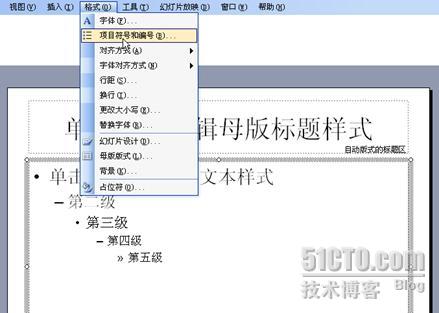
Click the "master" toolbar "Close Master View", you can see the slide content is in accordance with the "master" in the settings change. $ Show_page $
2, using the "master" for each slide and add a unified text LOGO:
In the "View" menu, select "Master" | "Slide Master"
Select the "Insert" menu "image" | "from file" and find the LOGO image inserted into the master of them, and move to the desired placement.

select "Insert" menu "image" | "WordArt", select a WordArt style, click "OK" and enter text, and set the font, font size, click "OK." In the "master" WordArt will be inserted to move to the desired placement.

click "Close Master View" see the effect.
3, using the slide master to unify the background:
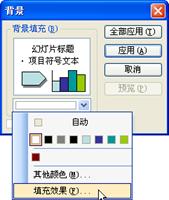
Open the "master" attempt, click "Format" menu "background", select "background" in the "Fill Effects." In the "Fill Effects" to select "Picture" toolbar, select the desired setting as the background picture, click "OK" to exit. So each slide with the "master" in the same setting.
 $ show_page $ $ show_page $
4, using the "master" on the "Title Slide layout" of the slide with different settings:
Open the "master" view, click the "Insert" menu in the "New Title Master."

can be seen in the "master" view, the emergence of a new master, new master from the original master version of the same format, but the new master as the "Title Slide Master."
"Title Slide Master" setting method and the "slide master" set the same. 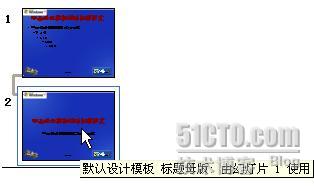
this document in the presentation format used in the title slide on the use of the "Title Master" style, using the title and text layout of the slide on the use of the "Title and Slide Master" style.
In the latest Office 2007, you can "view" tab find the "slide motherboard" button, the "Slide motherboard" function to use Office 2003 and above in the process is essentially the same. In addition, Office 2007 introduced a "theme" of such a new concept, you can quickly color uniform style throughout the document, text fonts and graphic effects, which is to achieve unity of a slide format is a good way! |