Office software is closely linked to the PDF,the PDF is also must have to control!
Set home Page Add to Favorites
|
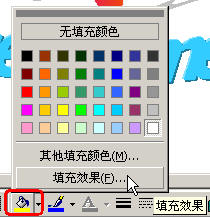
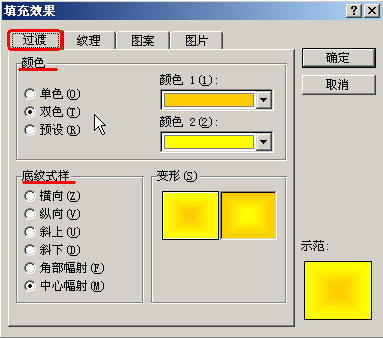
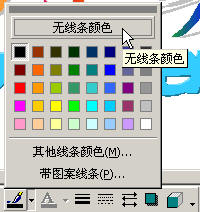
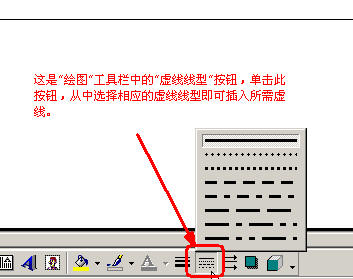
If the "Drawing" toolbar is not show how to do? Do not, please use this method to solve: Click the "View" menu -> "Drawing toolbar "-->"" 2, change the fill color AutoShape lines and colors: A, change the color filled AutoShape: (1) Drawing toolbar click the "Fill color" -> according to the actual need to select "fill effects", in Figure (17):  (2) to the "fill effects" dialog box, select the "transitional" tab, and from the "color" column select "color" (of which 1 to choose the color "gold", choose color 2 "yellow") , from the "Shading style" field select the "radiation center" and finally click "OK" button, Figure (18):  B, change the color AutoShape lines: Drawing toolbar click the "color line" button and select the desired color or other options, in Figure (19):  3, the location and size of AutoShape adjustments: Specific methods and pictures, and art related to the same settings. For other "Star Cross" on-demand production of graphics, we may be through the "copy" "paste" operation is complete, of course, can be carried out according to actual needs and settings adjusted accordingly. 4, AutoShape line (straight, dotted line) insertion and settings: (To insert the magazine cover below the dotted line as an example) (1) Click the "Drawing" toolbar "straight" button; (2) hold the left mouse button pressed, drag, you can insert a straight line; Have encountered this kind of trouble: a straight line drawn is always a bit bent, not straight imaginary? Drawing a straight line to tell you a little trick: Click "Drawing" toolbar "straight-line" button, hold down the Shift key and then hold the left mouse button pressed, drag, so you can draw a straight line. (3) change "linear" to "dotted line": Click "Drawing" toolbar "dotted line" button and select the corresponding dotted line, dotted line to insert the required figure (20):  |